 Click here to see us on Facebook
  Follow Me on Pinterest
Stair Stepping
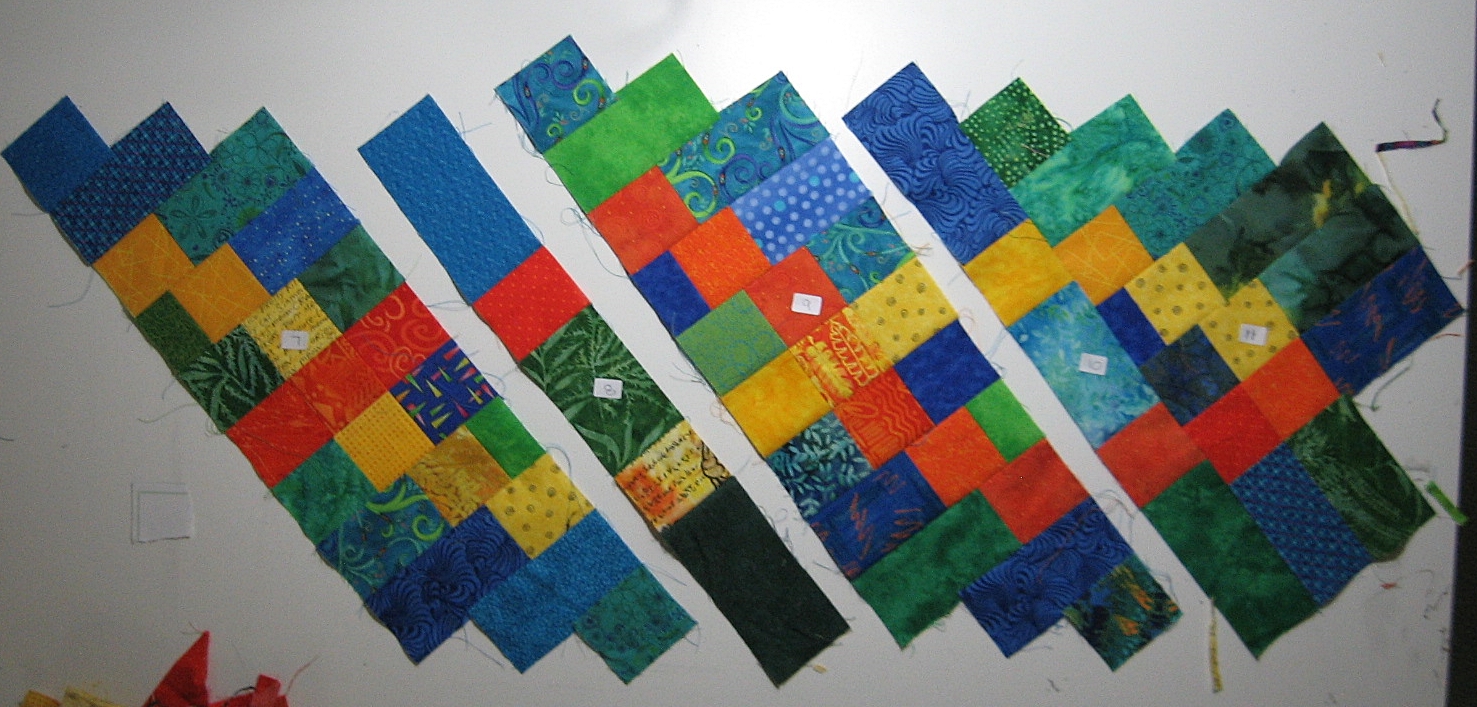
.JPG) Time to assemble the quilt top. Sections numbered?...check. A French Braid is assembled on the diagonal and each section is stair stepped up half the width of the adjacent accent. The finished squares are 2" so I measured in 1", put a mark and then lined the mark up with the seam of the adjacent section. When I made the sets, sewing end to end, I was careful to attach the sets on the salvage so that when I started the assembling, which is attaching the sides together, I would be dealing with the bias and would be able to stretch it to match it up. I was pleasantly surprised that not much stretching was required! Since I was careful about the labeling of the sections and also about keeping the labeling numbers in the proper perspective (right side up), it went together easily. One thing I have found is that if I want the top to lay flat, it is important to maintain a 1/4" seam allowance throughout. If one veers off of that in the middle of a seam, it will either pop up when it is being pressed or pull. depending on it the allowance is < or > the 1/4" allowance. I always do a partial rip out and resew that part of the seam if it pops up or puckers. It makes quilting a lot easier when the quilt top lays completely flat.
Time to assemble the quilt top. Sections numbered?...check. A French Braid is assembled on the diagonal and each section is stair stepped up half the width of the adjacent accent. The finished squares are 2" so I measured in 1", put a mark and then lined the mark up with the seam of the adjacent section. When I made the sets, sewing end to end, I was careful to attach the sets on the salvage so that when I started the assembling, which is attaching the sides together, I would be dealing with the bias and would be able to stretch it to match it up. I was pleasantly surprised that not much stretching was required! Since I was careful about the labeling of the sections and also about keeping the labeling numbers in the proper perspective (right side up), it went together easily. One thing I have found is that if I want the top to lay flat, it is important to maintain a 1/4" seam allowance throughout. If one veers off of that in the middle of a seam, it will either pop up when it is being pressed or pull. depending on it the allowance is < or > the 1/4" allowance. I always do a partial rip out and resew that part of the seam if it pops up or puckers. It makes quilting a lot easier when the quilt top lays completely flat.
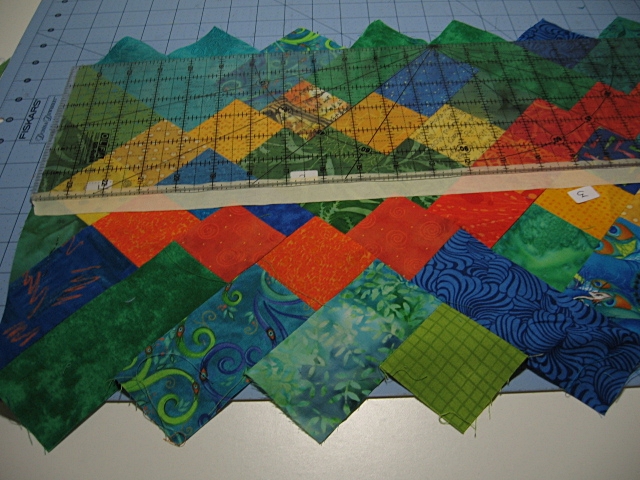
Time to trim the zig zag points! (see middle photo) I used masking tape and lined it up along the verticle center on the column so that both sides would be trimmed to the same width. It was easy to find the center since this is where the braid crosses. Final size once points were trimmed? 11-1/2 " by 5 feet long. It seemed to need a border and this dark blue fabric seemed to be just right. It is definately the longest table runner I have ever made. The final photo is a detail of the finished quilt top. Backing fabric still needs to be procured, but as far as I am concerned my first French Braid is finished. It was fun learning how to make something new and blogging about it!
- Sandy's blog
- Log in to post comments